You’re looking for one killer exercise? The hip thrust builds serious glute strength fast. Position your upper back on a bench, feet shoulder-width and planted firmly, then drive through your heels until your thighs hit parallel—pause and squeeze hard at the top. Barbell, dumbbells, bands—pick your load and keep that core braced, spine neutral. Avoid arching excessively and losing heel contact; those’re the quick wins that separate results from frustration. There’s plenty more on nailing every detail.
Key Takeaways
- Position upper back under shoulder blades on a 13–19 inch bench for stable pivot and core bracing.
- Press through heels with feet shoulder-width and shins nearly vertical to maximize glute activation at lockout.
- Lower until thighs reach parallel to floor, then actively clench glutes for 1–2 seconds at top.
- Center barbell across hip crease with thick padding to prevent slipping and distribute load safely.
- Use progressive overload via barbells, dumbbells, or bands; perform 3–4 sets with pauses or band resistance.
Set Up Your Hip Thrust: Bench, Back, and Feet
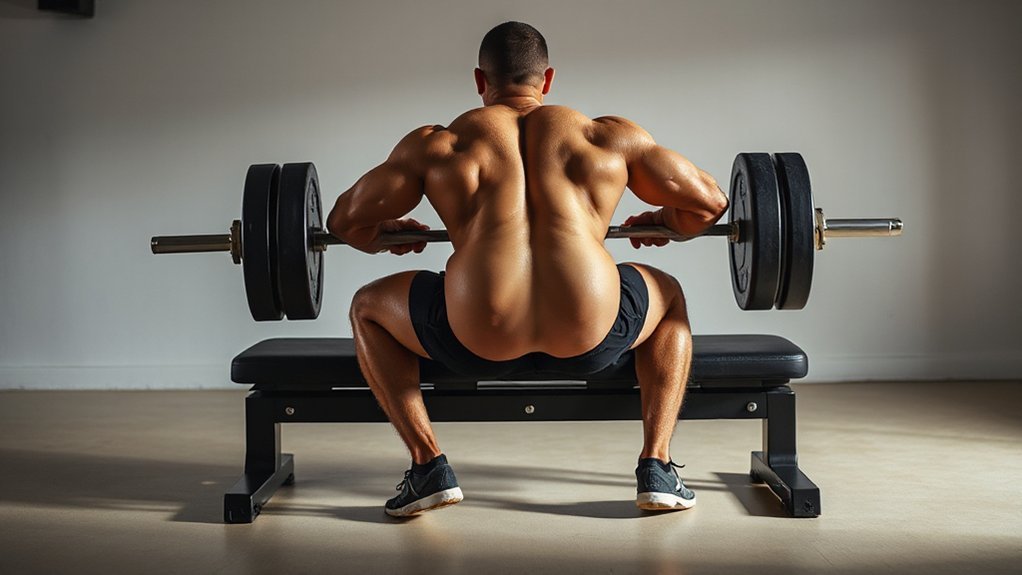
Getting your setup right—bench height, back position, foot placement—makes or breaks the whole exercise. You’ll want a sturdy bench around 13–19 inches high, ideally 16 inches. Position it so your upper back sits snugly under your shoulder blades, creating a stable pivot point.
Now settle in. Your upper back contacts the bench, chin tucked, core braced. Here’s the trick: press your shoulder blades into the bench rather than sliding around. It’s about creating tension, not shifting.
For your feet, plant them roughly shoulder-width apart and pull them toward your glutes. When you reach full hip extension, your shins should sit nearly vertical—that’s about 90 degrees at the knees. This positioning matters because it lets you drive power through your heels, keeping those toes down and screwed into the floor. You’re building a foundation here, one that keeps you grounded and strong.
Drive Through Your Heels: The Movement and Top Position
Now comes the payoff—you’ve got your foundation set, so let’s fire those glutes up. Here’s what actually matters when you drive:
Now comes the payoff—you’ve got your foundation set, so let’s fire those glutes up.
- Press through your heels to shift force away from your quads and into your glutes, keeping full heel contact as you thrust upward
- Stop when your thighs hit parallel to the floor—this sweet spot maximizes glute tension without letting hamstrings take over
- Never rise onto your toes. If you catch yourself doing it, shuffle your feet closer to your body or consciously anchor those heels down
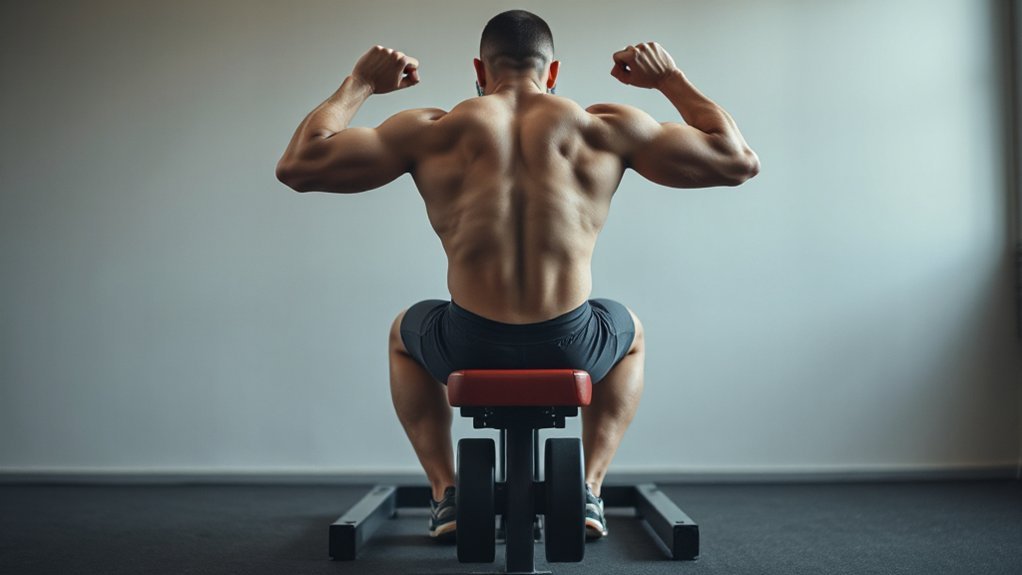
At the top, actively clench your glutes hard for one to two seconds. Keep your spine neutral—no arching your lower back like you’re showing off. Maintain that straight line from shoulders through knees. Before each rep, breathe deep, brace your abs, then forcefully drive those heels into the floor. This sequence protects your spine and transfers maximum power through your hips, which is exactly what you’re after.
Hip Thrust Loading: Barbells, Dumbbells, Bands, and Machines
Once you’ve nailed the movement itself, it’s time to pick your weapon—because how you load the hip thrust matters just as much as how you perform it.
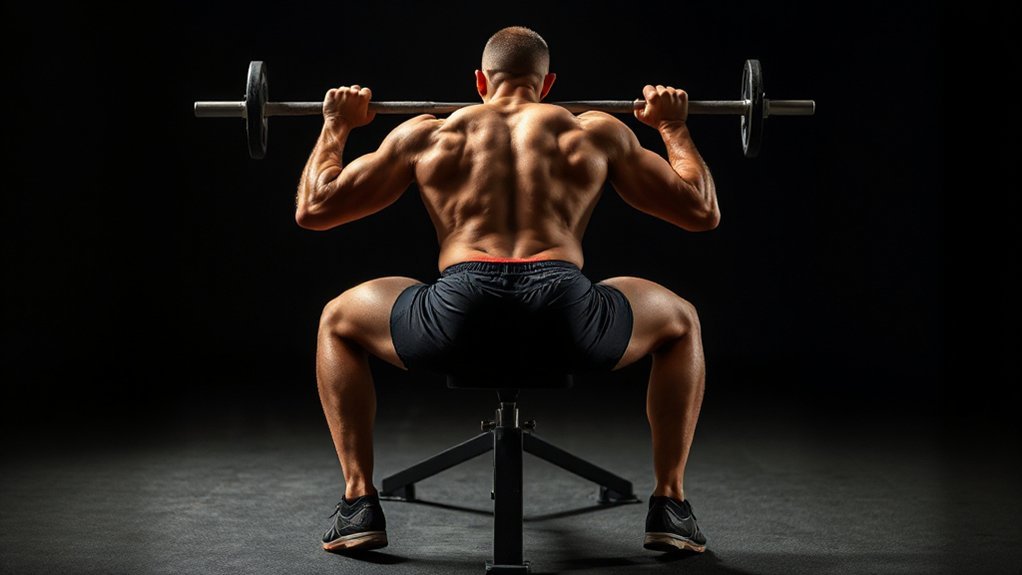
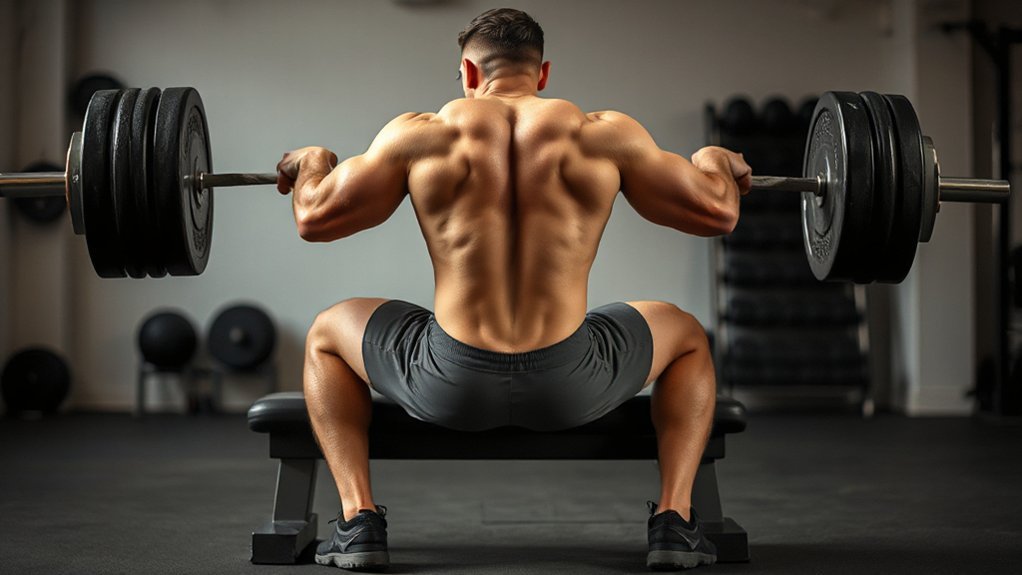
Barbells reign supreme for raw strength. Drape an Olympic bar across your hip crease (pad it thick), then progressively add plates week after week. It’s the gold standard for building serious power.
Dumbbells or weight plates work great if you’re chasing smaller jumps or traveling. Rest one on your pelvis, start light, and dial in stability before climbing.
Bands add variable resistance—loop a heavy one over your hips, anchor it under your feet, and feel that top-end squeeze. Just remember: dumbbell anchors cap out fast.
Machines and Smith setups? They’re your ticket to volume. Guided bars, easy loading, less stabilization stress. Perfect when you’re grinding hard or switching weight constantly.
No matter what you choose: center the load, pad generously, stabilize with your hands. Your glutes will thank you.
Common Hip Thrust Mistakes and How to Fix Them
Even when you’ve got the loading dialed in, form can slip—and fast.
Your lower back’s probably taking heat when you’re arching too hard. Reduce the load, brace your core tight, and use that abdominal brake at lockout to keep your spine neutral. Here’s what else trips you up:
- Foot placement matters. Feet too far forward? You’ll go quad-heavy and your toes rise. Shift your feet toward your glutes so your shins stay roughly vertical at the top, then drive through your heels.
- Bar positioning and padding. A slipping bar or painful hip pressure tanks your force output. Center that bar in your hip crease and grab a thick pad—Squat Sponge or folded mat works—to protect your pelvis.
- Incomplete lockout. Stopping short of full hip extension cheats your glutes. Hit thighs parallel to the floor, squeeze hard at the top, and consider feet-elevated variations if you need more range.
Don’t forget: tuck your chin, keep ribs down, and stay neutral. These tweaks transform your thrust.
Progress Your Hip Thrust: Single-Leg, Elevated, and Loaded Variations
As your bilateral hip thrusts get stronger, you’ve hit a ceiling—and that’s exactly when variations become your best friend. Here’s what works: single-leg thrusts demand serious stability and unilateral glute focus, so dial back the weight and aim for 6–12 reps per side. Not ready? Try B-stance first—one foot slightly forward—to correct imbalances before going full single-leg. Feet-elevated variations stretch your glutes deeper and boost activation; start modest with box height and progress carefully to avoid lumbar compensation. For loaded work, barbell dominates progressive overload, but dumbbells and bands offer easier setups with real results. Whatever you choose, pad that bar, stabilize with your hands, and commit to 3–4 sets. Add pauses at the top or band resistance to crush time under tension. Your glutes’ll thank you.
Frequently Asked Questions
Is Hip Thrust Good for Runners?
Yeah, hip thrusts are genuinely excellent for you as a runner. You’re strengthening your glutes—the powerhouse behind sprint acceleration and hip stability. Plus, you’re reducing injury risk by fixing strength imbalances that mess with your gait. Aim for two to three sessions weekly, three to four sets of six to twelve reps with progressive weight. Your knees and lower back’ll thank you, and you’ll notice faster takeoffs almost immediately.
Are Hip Thrusts Safe for My Knees?
Want to know the real secret? Hip thrusts are actually knee-friendly when you nail the basics. You’re driving through your heels, not your toes—that’s key. Keep your feet shoulder-width apart, shins vertical at the top, and let your glutes do the heavy lifting. Strong glutes mean better knee tracking everywhere else, too. Start light, focus on form, and you’ve got yourself a genuinely safe exercise.
How Essential Are Hip Thrusts?
Hip thrusts aren’t strictly essential—you can build a solid physique without them. But here’s the thing: they’re incredibly efficient. You get massive glute activation, heavy loading without back limitations, and carryover to sprints and jumps. If you’re serious about glute development or athletic performance, they’re honestly tough to beat. Skip them? You can. Regret it? Probably.
So
You’ve got all the pieces of the puzzle now. Master your setup, nail those heel drives, and don’t shy away from loading up—that’s where the magic happens. Start simple, fix those common mistakes, and when you’re ready, level up with single-leg or elevated variations. Your glutes won’t know what hit ’em. Consistency’s your best friend here, so get after it and watch your power soar.


Leave a Comment